Text section
Updated
This article explains how to use the Text section of the Productivity tools.
Apply the default text box format to text boxes

- Select the text box that you would like to apply the default text box format to.
- Click on apply default text box format button.
Note
The default text box is searched in the following order:
- A hidden shape in the Slide Master named TextBox.
- The body placeholder in the Slide Master.
- If nothing is found, the PowerPoint default will be inserted.
|
Apply margins to a text box

- Select the text box you would like to apply margins to.
- Click on text margins button.
- Set the desired margins.
- Click Ok.
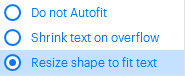
Apply auto-size options

- Select the shape(s) you would like to edit.
- Click Auto-size button.
- Click on the desired option.
Activate/Deactivate word-wrap

- Select the shape(s) you would like to edit.
- Click word-wrap button.
Note
The word-wrap button will be highlighted if the word-wrap is activated on the selection.
|
Increase/Decrease line spacing


- Select the text box, shape, or paragraph you would like to edit.
- Click on Increase line spacing or Decrease line spacing button.
- Increase line spacing will increase the line spacing of the selection (0.125).
- Decrease line spacing will decrease the line spacing of the selection (0.125).
Split text box

- Select the text box you would like to split.
- Click on Split text box button.
Note
- Every paragraph contained in the text box will become separated text boxes.
- The text formatting will be kept.
|

Merge text boxes

- Select the text boxes you would like to merge together.
- Click on Merge text box button.
Note
- All text boxes will be merged in one single text box.
- The text formatting will be kept.
- The ordering logic is top left to bottom right.
|
Split tables into text boxes

- Select the PowerPoint table you would like to split.
- Click on Split table to text boxes button.

Swap the text between two text boxes

- Select the two text boxes you would like to swap.
- Click on swap text button.
Note
The text formatting will be swapped but the alignment.
|
Footnotes

- Place the cursor where you would like to insert your footnote in the text.
- Click on Footnote button.
- Add a footnote reference will be added where your cursor is and to the footnote area for direct editing.
- Update your footnotes will be updated.
Note
- Footnotes are sorted automatically in order of appearance (top left to bottom right).
- With every click on Add or Update, the footnotes are synchronized.
|

Set the language for all the text in the presentation

- Click on Set Proofing Language button.
- Select the desired language.
Note
Clicking on "Configure" in the drop-down menu will allow you to add additional proofing languages.
|
productivityplus
colors
check for powerpoint
end_user_role
Comments
Article is closed for comments.